Stock Posting or Purchase Stock is a Feature in StoreApp that allows you enter your Stock / Purchased goods from your suppliers.
Do you need help on how to use this feature, check the steps below:
Step 1:
From StoreApp start page, click Administrative, from the drop down list, click Inventory, then Stock Posting

Step 2:
After clicking on Stock posting, Kindly click on the nodes on the Supply To and select a store.
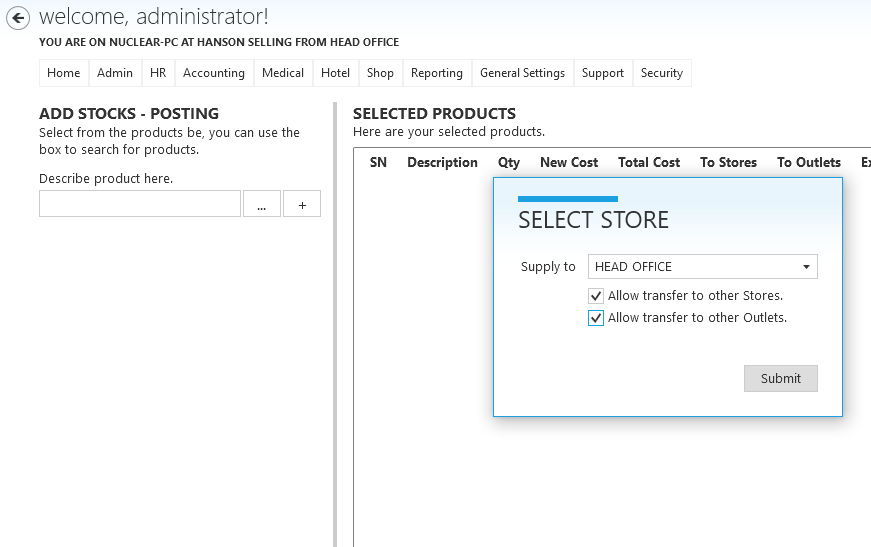
Step 3:
If you choose Warehouse, it’s going to ask you to post your stocks to warehouse as seen in the picture below:
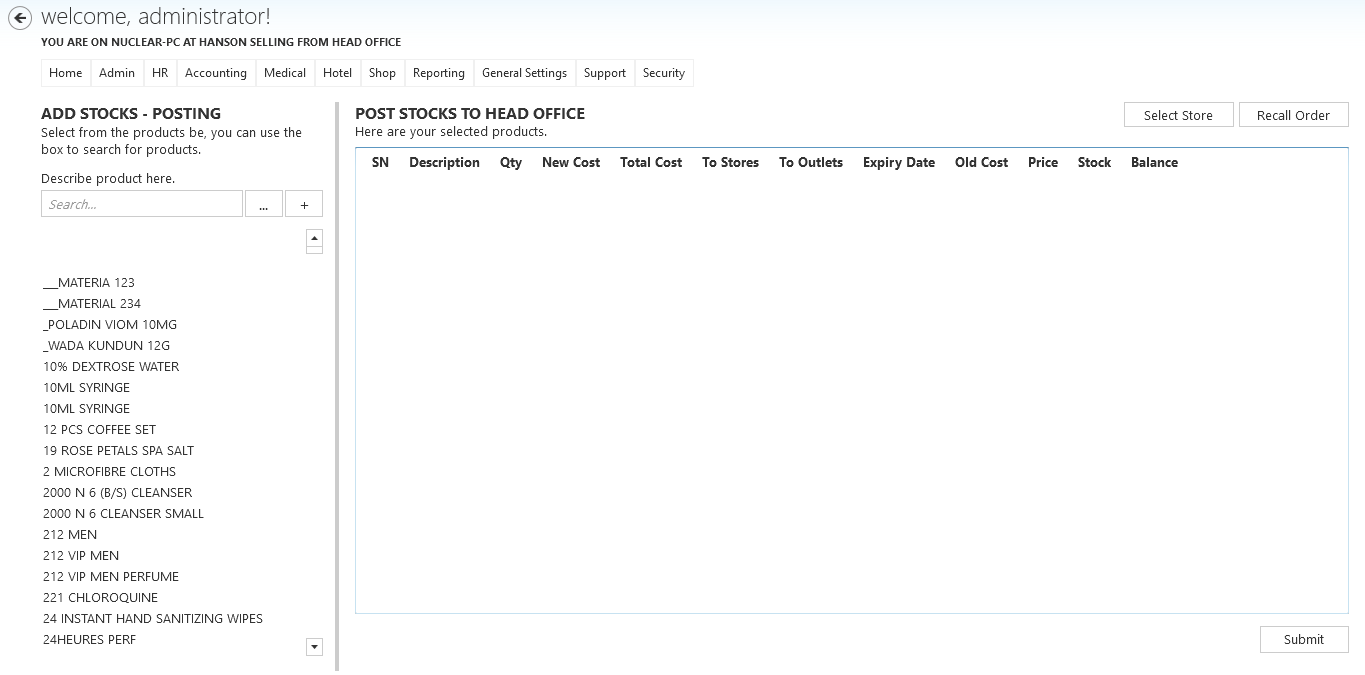
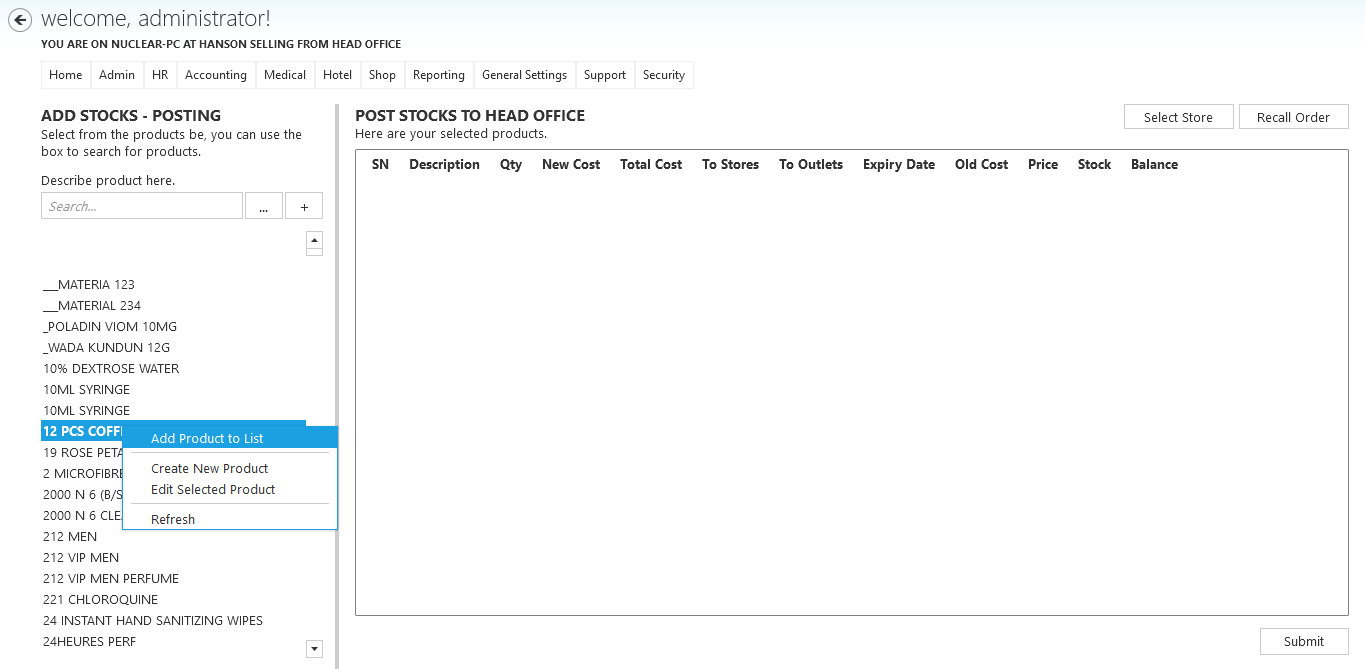
Step 4:
To add products, you can either double click on the product you want to add or right click on the product and select Add product.
Step 5:
When the Add Products to Stocks Dialog opens, enter the required information and click Add to list
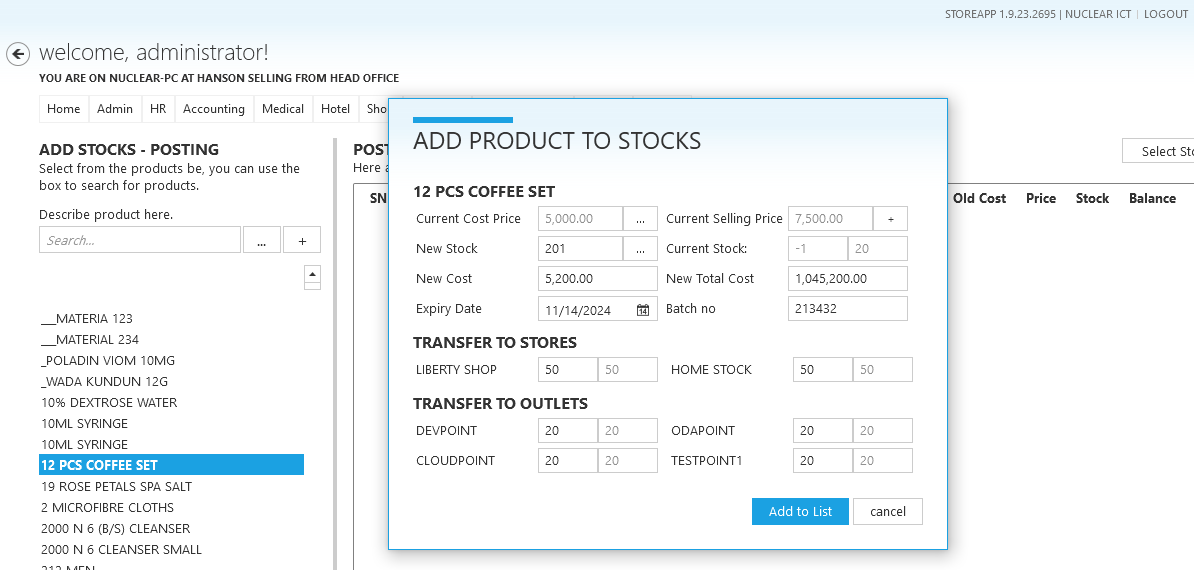
- New Stock: is the number of items you want to post
- New Cost Price: is the price at which you purchased the new products
- New Total Cost Price: this is automatically calculated by the system based on the prior information entered
- Expiry Date: is the expiry date of the product
- Transfer Qty: is the number of items you want to transfer to your default store (your default store is the store you are selling from).
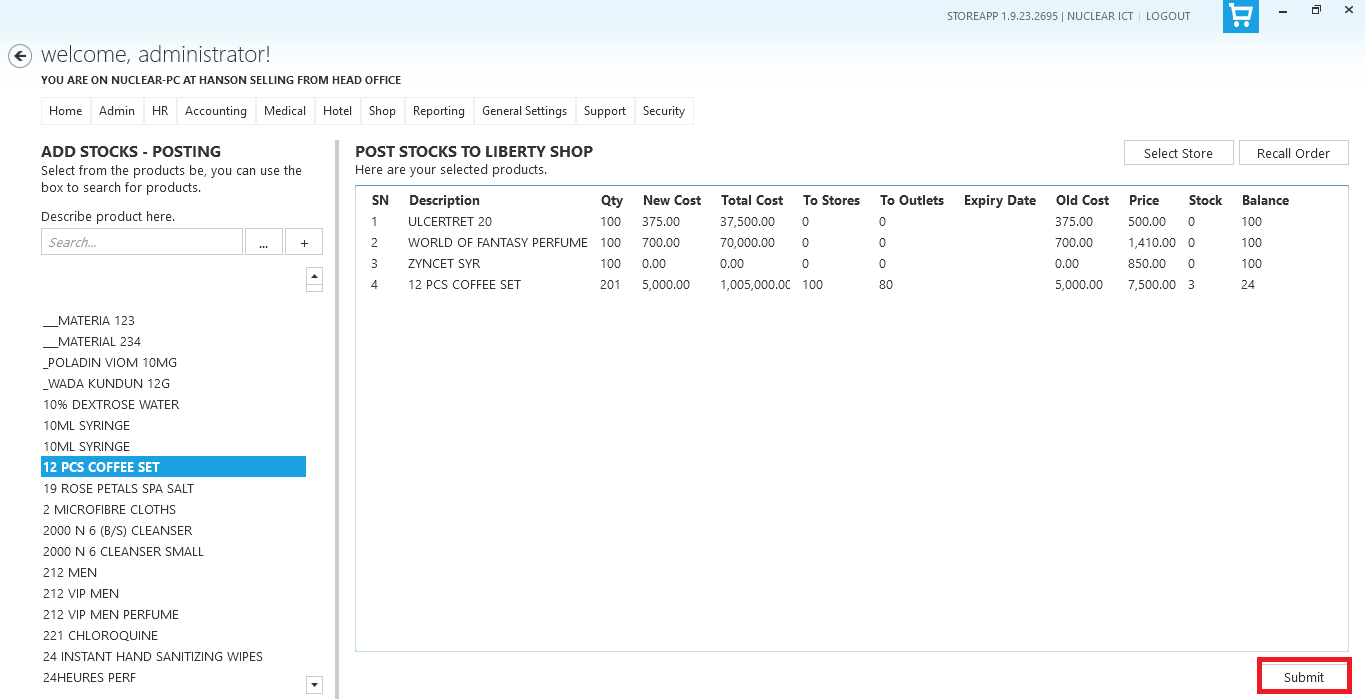
Step 6:
Repeat “Step 3” for all the products on a particular invoice and click Submit when done.
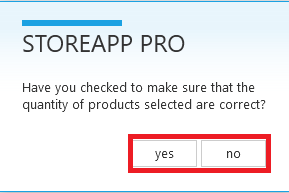
 Step 7:
Check if the quantity of products in your receipt matches that which is on the system. Click yes, if it matches and no if otherwise
Step 8:
Fill in the correct information and click on Submit when done.
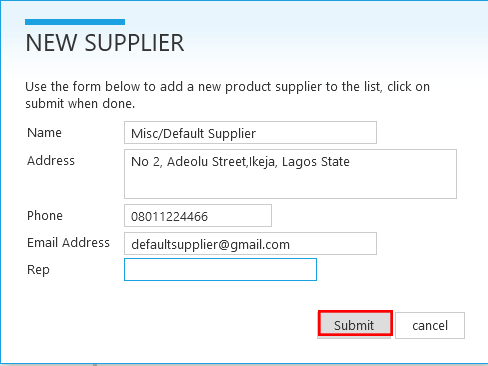
Supply From: Click the arrow to select from a list of suppliers. CLICK HERE to see how to add a new supplier.
Amount Paid: Enter the amount you paid for the goods and your mode of payment. If you purchased the goods on credit, enter 0.
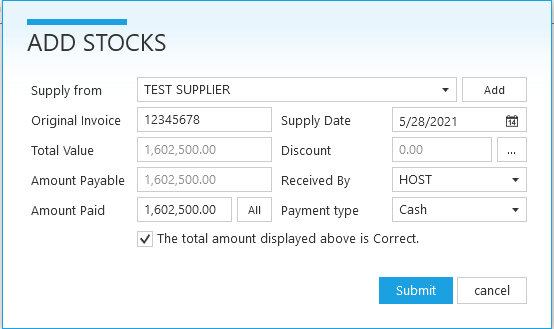
Step 9: You can add a new supply if it hasn’t been added before. By clicking on the add button to fill the form below, Then submit;
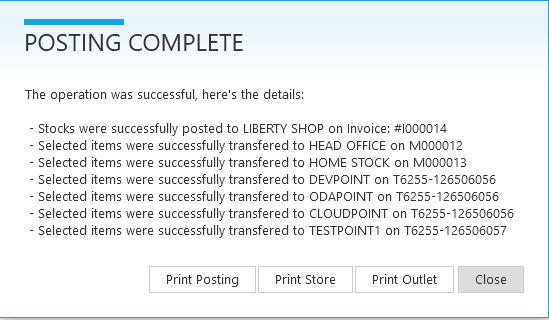
Step 10:
Your Stock has been posted, Click on print posting to complete the process.