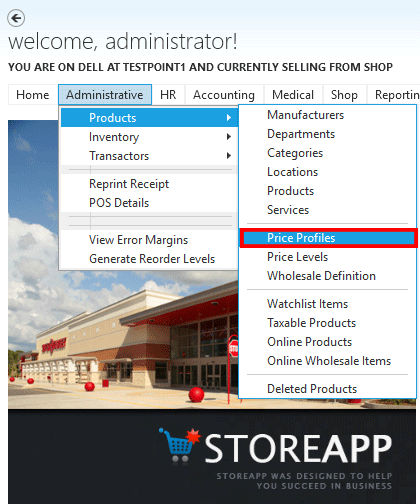
Step 1:
From StoreApp start page, click Administrative, and select Products from the drop down list, then click Price Profiles
Step 2:
Click on Add Price Profile

Step 3:
On the Add Price Profile Dialog Box, enter the required information and click on Submit when done.
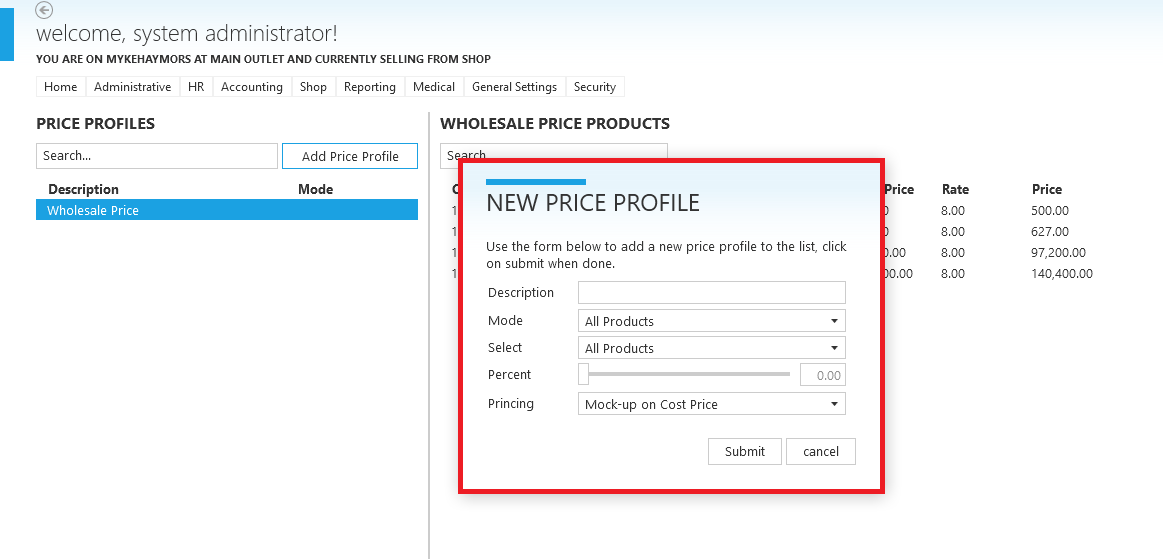
- Description: this is the title of the Price Profile
- Mode: here, products are classified into: All Products, Department, Category, Manufacturer, Brand, Selected Products, so that you can select where the Price Profile should take effect.
- Select: Depending on what you choose in Mode, this is a sub-division of the product you want to create a Price Profile for.
- Percent: this is the discount in percentage, to edit, just move the slider to the right or left.
- Pricing: this is divided into Mock-up on Selling Price, Mock-up on Cost Price and Discount on Selling Price.
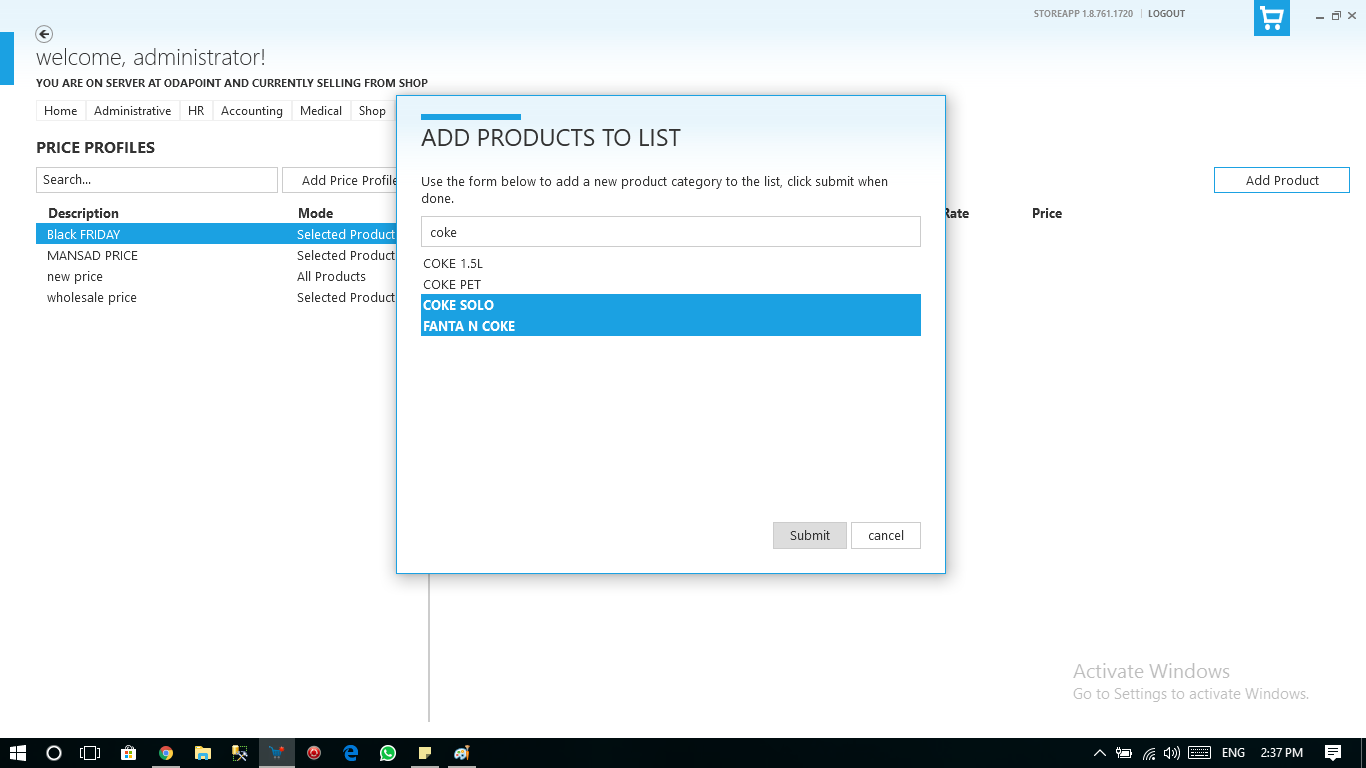
Step 4:
If the mode you selected was Selected Products, you will need to manually add products to the profile by doing the following:
- Select the price profile on the left and click on Add Product on the right.

- Type the product name or brand name or manufacturer or category or department into search text and select one product or multiple products (do this by holding down Ctrl button on the keyboard while selecting the products) or all products (do this by pressing Ctrl and A on the keyboard)
- Click on submit when done
 Note that you can
- Edit, Reset or Delete a Price Profile.
- Edit the price or remove a particular product from a Price Profile by searching for the product in the profile, right click on it, and select any option.
CLICK HERE to see how you can sell your product using a price profile.